 Enable iCloud Photos: Utilize the iCloud Photos feature on your iPhone to automatically sync your videos and photos with iCloud. This will make it easier to access them from your PC without relying on iTunes.
In today’s digital age, capturing special moments through videos and photos has become an integral part of our lives. Whether it’s a family vacation, a friend’s birthday party, or simply a beautiful sunset, we want to preserve these memories and share them with our loved ones. However, transferring these precious moments from our iPhones to our PCs often proves to be a tedious task. Thankfully, Apple has provided a solution – iCloud Photos.
By enabling iCloud Photos on your iPhone, you can effortlessly sync your videos and photos with iCloud. This means that all your cherished memories will be securely stored in the cloud, ready to be accessed from any device, including your PC. No longer will you have to rely on iTunes as the intermediary for transferring your media files. With iCloud Photos, the process becomes seamless and hassle-free.
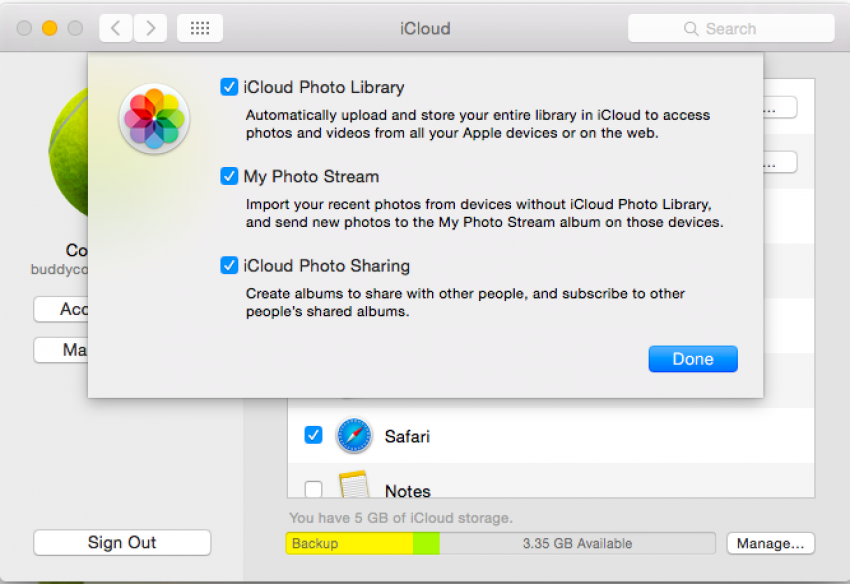
To enable this feature, simply go to the settings on your iPhone and tap on your Apple ID at the top of the screen. From there, select “iCloud,” then “Photos.” Toggle on the switch for “iCloud Photos,” and voila! Your videos and photos will now be automatically uploaded to iCloud whenever your device is connected to Wi-Fi. This ensures that your media files are backed up and readily available, even if your iPhone is lost or damaged.
One of the major advantages of using iCloud Photos is the convenience it offers in accessing your media files from your PC. Gone are the days of connecting your iPhone to your computer and manually transferring each file. Now, with iCloud Photos, you can simply log in to iCloud on your PC’s web browser or utilize the iCloud for Windows app. All your videos and photos will be organized in a user-friendly interface, allowing you to easily browse and download them directly to your computer.
Furthermore, iCloud Photos also allows you to share your albums with friends and family, making it easier than ever to relive those precious moments together. Whether it’s a wedding album or a collection of vacation pictures, simply create an album in the Photos app on your iPhone and choose the option to share it. Your loved ones can then view and even add their own photos to the shared album, creating a collaborative and memorable experience.
In conclusion, enabling iCloud Photos on your iPhone is a game-changer when it comes to managing and accessing your videos and photos. With the ability to automatically sync your media files with iCloud, you no longer have to worry about losing them or spending hours transferring them to your PC. Embrace the convenience that iCloud Photos offers and start preserving and sharing your memories effortlessly.
Installing iCloud for Windows is a simple yet effective way to seamlessly access and sync your iCloud photos and videos directly on your PC. With this powerful tool, you can enjoy the convenience of having all your media files readily available on your computer. To get started, follow these easy steps to download and install iCloud for Windows.
Firstly, head to the official Apple website and locate the iCloud for Windows application. This application is available for free and can be found in the downloads section. Once you have found the appropriate link, click on it to begin the download process.
After the download is complete, locate the downloaded file and double-click on it to initiate the installation. A setup wizard will guide you through the installation process, providing clear instructions along the way. Simply follow the prompts and agree to the terms and conditions to proceed.
Next, choose the desired iCloud features you wish to enable on your PC. These features include iCloud Drive, iCloud Photos, Mail, Contacts, Calendars, and Tasks. Select the options that best suit your needs, as enabling specific features will allow you to sync and access corresponding data across your devices.
Once you have made your selections, click on the “Install” button to begin the installation process. The tool will then download and install the necessary components onto your PC. This may take a few minutes, so ensure that you have a stable internet connection during this time.
Upon completion, you will be prompted to sign in to your iCloud account using your Apple ID and password. Enter the required information, and click “Sign In” to authenticate your account. This step is crucial, as it allows the iCloud for Windows application to sync your iCloud data seamlessly.
Finally, customize your iCloud settings according to your preferences. You can choose the folder location for your iCloud Drive files, control the syncing of photos and videos, and adjust other application-specific settings. Once you have configured your settings, click on the “Apply” button to save your changes.
Congratulations! You have successfully installed iCloud for Windows on your PC. Enjoy the benefits of having your iCloud photos and videos readily accessible on your computer. Whether you want to upload new files, view existing ones, or organize your media collection, iCloud for Windows provides a user-friendly and efficient solution for managing your iCloud data across devices.
Configure iCloud for Windows: After installing the iCloud for Windows application, open it and sign in with your Apple ID. Select the options to enable iCloud Photos and choose the folders where you want to store your synced videos and photos.
Configuring iCloud for Windows allows you to seamlessly sync your Apple devices with your Windows computer, ensuring that all your important files, photos, and videos are accessible across all platforms. With just a few simple steps, you can set up iCloud for Windows and start enjoying the benefits of having your data synchronized effortlessly. Let’s take a closer look at how to configure iCloud for Windows.
Firstly, you need to install the iCloud for Windows application on your computer. Visit the Apple website and download the application, then run the installer to begin the installation process. Once the installation is complete, open the app and sign in using your Apple ID. If you don’t have an Apple ID, you can create one for free.
Once you’ve signed in, you’ll be presented with a range of options to customize your iCloud experience on Windows. One of the most important features is iCloud Photos, which allows you to access your entire photo library from any device. Enable this option to ensure that your photos are synced across all your devices, including your Windows computer.
Next, choose the folders where you want to store your synced videos and photos. This step allows you to customize the location where your media files will be saved on your Windows computer. Select the folders that best suit your preferences and click “Apply” to save the changes.
By configuring iCloud for Windows, you’ll not only have access to your photos and videos but also other iCloud features such as Mail, Contacts, Calendar, and more. This seamless synchronization between your Apple devices and Windows computer ensures that you can effortlessly switch between devices while keeping all your important data up to date.
In addition to syncing your media files, iCloud for Windows also provides the ability to collaborate on documents using iCloud Drive. With this feature, you can create, edit, and share documents across all your devices, allowing for convenient and efficient collaboration with colleagues, friends, or family members.
In conclusion, configuring iCloud for Windows is a simple and essential process that allows you to have your Apple devices seamlessly integrated with your Windows computer. By enabling iCloud Photos and selecting your preferred storage folders, you can ensure that your photos and videos are effortlessly synced across all platforms. Take advantage of the other features provided by iCloud for Windows, such as document collaboration through iCloud Drive, to enhance your productivity and convenience. With iCloud for Windows, you’ll have all your important data at your fingertips, no matter which device you’re using.
Accessing your iCloud photos and videos on a PC is now easier than ever. With just a few simple steps, you can open up a world of memories and moments captured on your Apple devices. In this article, we will guide you through the process of accessing iCloud photos on your PC, allowing you to enjoy and share them with friends and family.
To begin, ensure that your iCloud is properly synced with your PC. This can be done by downloading and installing the iCloud for Windows application. Once you have installed the application, sign in using your Apple ID and password. Make sure to enable the Photos option during the setup process to ensure that your photos and videos are synchronized across your devices.
Once the syncing process is complete, you can access your iCloud photos and videos on your PC. Simply open File Explorer, which can be done by clicking on the folder icon located on your taskbar or pressing the Windows key + E on your keyboard. Within File Explorer, navigate to the designated iCloud folder.
Here, you will find all your iCloud photos and videos neatly organized by date and album. You can now browse through your collection, reliving cherished memories and revisiting unforgettable moments. Moreover, you have the freedom to transfer these files to any location on your computer, allowing for easy access and backup.
To transfer a photo or video to your PC, simply select the desired file, right-click, and choose “Copy” or press Ctrl+C. Then, navigate to the folder or location on your computer where you want to store the file, right-click, and select “Paste” or press Ctrl+V. The file will be copied from your iCloud folder to your chosen destination, granting you quick access even without an internet connection.
Furthermore, you can also delete photos and videos from your iCloud folder directly on your PC. This provides a convenient way to free up storage space on your iCloud account without the need to access it through your Apple devices. Simply select the file you wish to delete, right-click, and choose “Delete” or press the Delete key on your keyboard. A confirmation dialogue will appear, ensuring that you do not accidentally remove any files.
In conclusion, accessing your iCloud photos and videos on your PC is a straightforward process. By installing the iCloud for Windows application and enabling the Photos option, you can easily synchronize your files across devices. Opening File Explorer and navigating to the designated iCloud folder grants you access to your entire collection, allowing for seamless browsing, transferring, and deleting of files. Embrace the convenience and flexibility of accessing your iCloud photos on your PC, and relive your cherished memories with ease.
If you prefer not to use iCloud, there are alternative methods available to transfer your videos and photos from your iPhone to your PC without the need for iTunes. One such option is to use third-party apps or services like Google Photos or Dropbox.
These third-party services offer dedicated apps or web interfaces that make it incredibly easy to upload and download your media files. By using these apps or services, you can bypass the need for iTunes altogether and have greater control over your files.
Google Photos, for example, provides unlimited cloud storage for your photos and videos. Once you install the app on your iPhone and sign in with your Google account, you can select the option to automatically back up all your media files to the cloud. This ensures that all your precious memories are safe and accessible from any device with an internet connection.
Similarly, Dropbox is another popular option that allows you to sync and access your files across multiple devices. By installing the Dropbox app on your iPhone, you can easily upload your videos and photos to your Dropbox account. Once uploaded, you can access them on your PC by logging in to your Dropbox account through the web interface or by installing the Dropbox app on your computer.
These third-party apps and services not only provide a convenient way to transfer your media files but also offer additional features. For instance, Google Photos uses AI technology to organize your photos and create albums automatically. Dropbox allows you to share files with others, collaborate on projects, and even restore previous versions of your files.
Moreover, these services often offer free storage space up to a certain limit, and if you require more storage, you can choose to upgrade to a paid plan.
In conclusion, if you prefer not to use iCloud or iTunes, there are a variety of third-party apps and services available to transfer your videos and photos from your iPhone to your PC. Services like Google Photos and Dropbox offer dedicated apps and web interfaces that make the process seamless and convenient. With these alternatives, you can easily upload and download your media files, access them from any device, and take advantage of additional features and storage options.